A lot of species were split from postica and described by one Ulf Eitschberger. All from a single locality in the Eastern Cape. And published in his very own journal which does not appear to be available on the net. These are allessandroi, asantei, joannoui (odd distribution on Afromoths - ZA and Gambia - hmmm...), kruegeri, pseudoasantei, staudei. Kitching has sunk them all back into postica, Afromoths has not. For my own personal opinion, they're all postica and I'm leaving it like that for now.
It is entirely possible that diana is merely an ecomorph of postica. It has been bounced in and out of postica over the millenia and will no doubt keep bouncing for a while. Only found in Namibia and Angola.
diana has a plain form like postica but I couldn't find a nice pic on iNat.
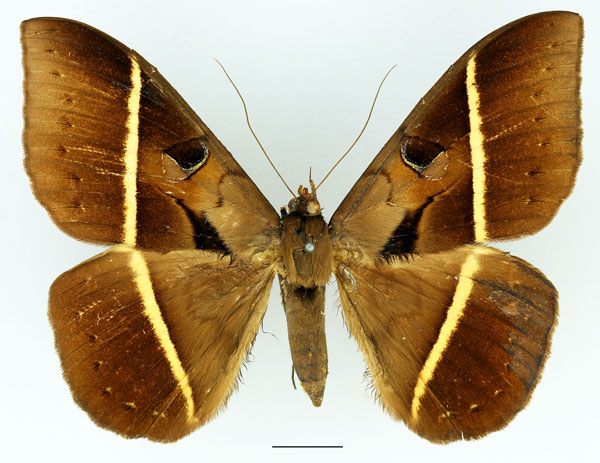
postica is widespread over sA from about George northwards and tropical Africa. There is even a record on iNat in Cape Town (https://www.inaturalist.org/observations/121098128) which is a big range extension as far as I know. Possibly because Celtis trees (caterpillar host-plant) are planted in gardens everywhere.
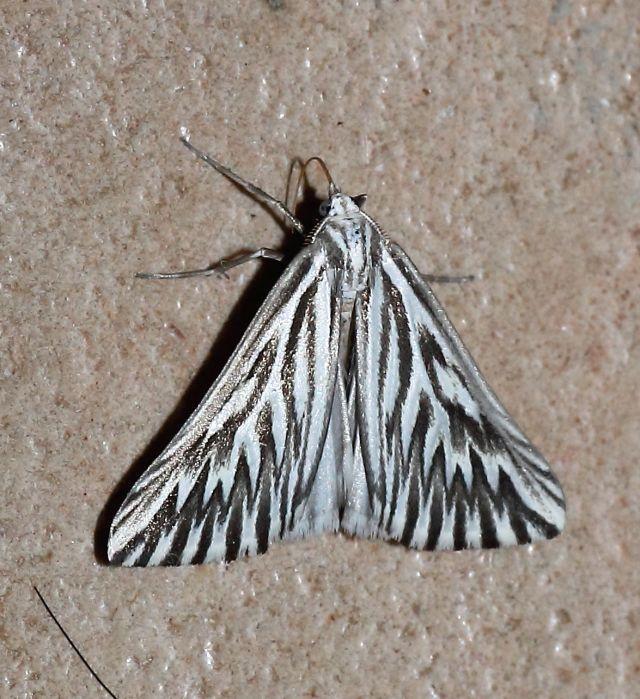
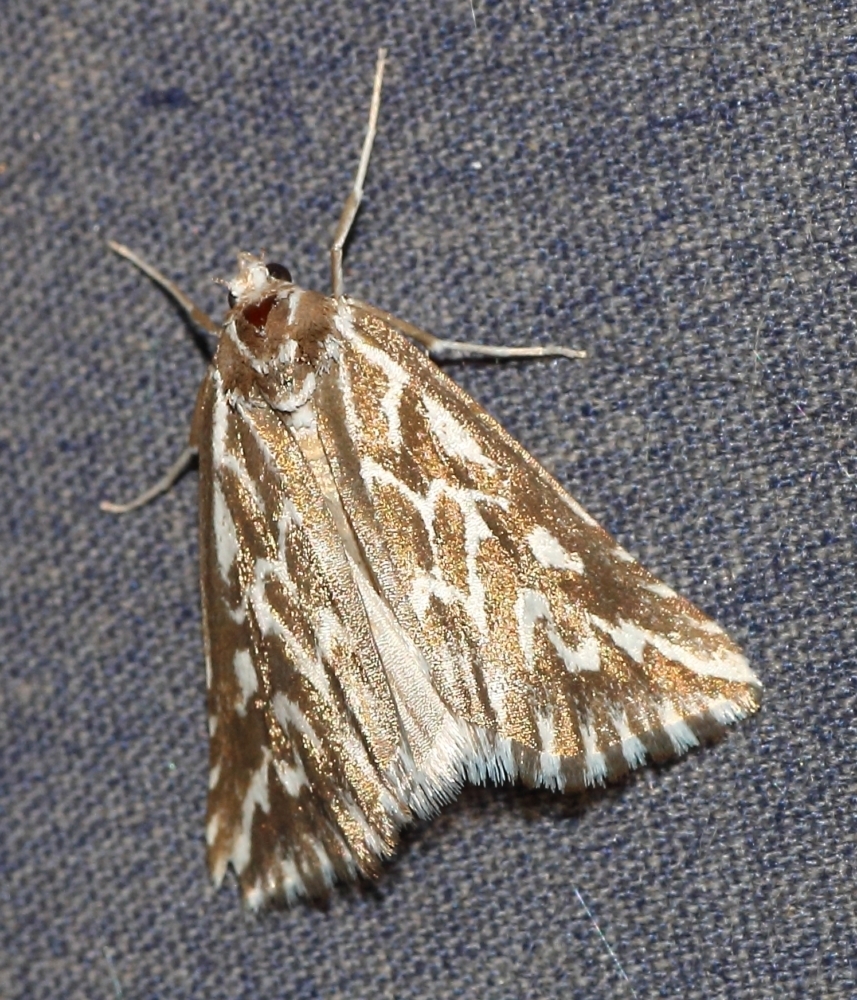
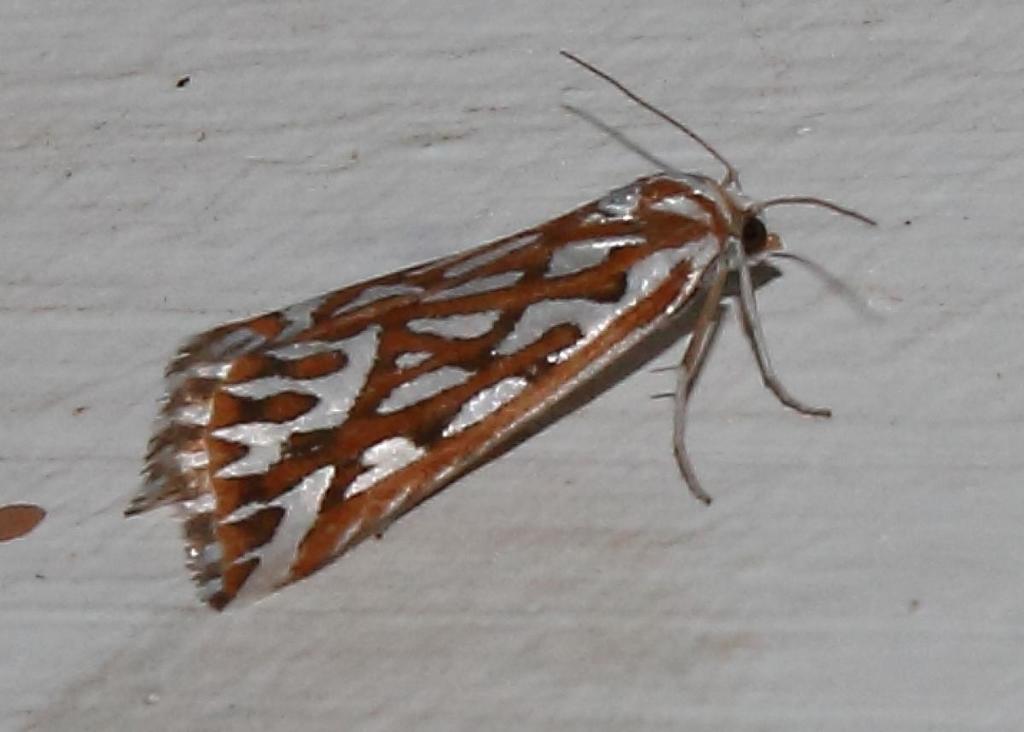
postica is a highly variable species! The photos here show only some of the variation.
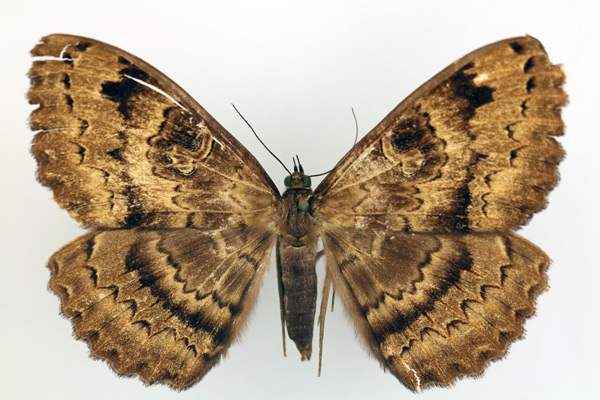
molitor occurs in NE South Africa and into tropical Africa.
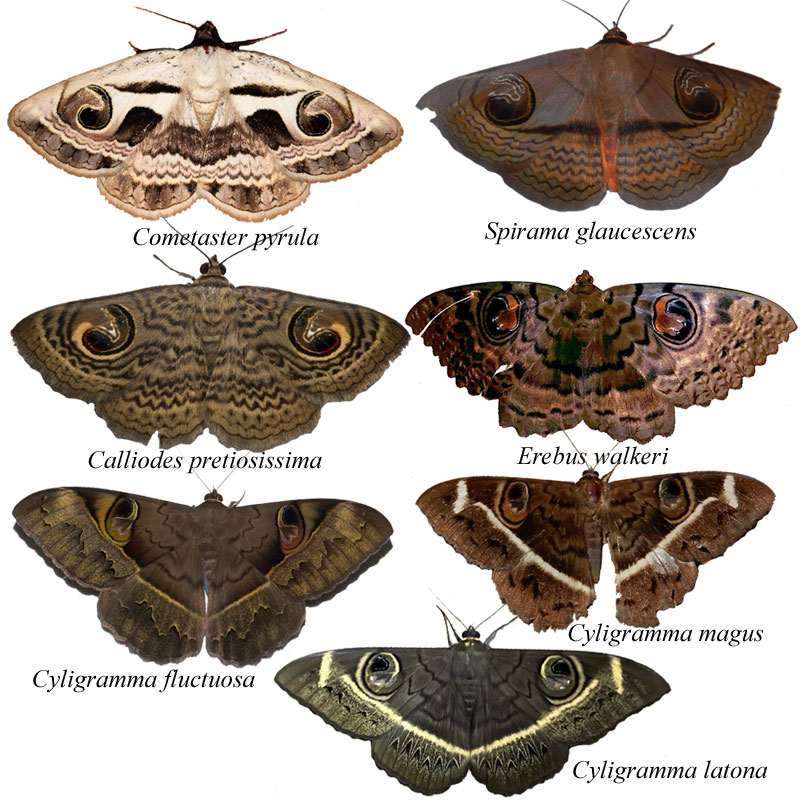
The insets of the silver markings are all from the left forewing.
Notes
N. lannini apparently occurs in Moz. Looks pretty similar to N. funebris.
N. rosae and N. oenopion on Afromoths look so similar to me that I can't tell the difference. We have only one ob on iNat so far (ID'd as rosae), so I have no comparisons to work with.
All my images here need to be confirmed - please don't take this cheat sheet as gospel. If you have any suggestions for ID tips or corrections, please let me know!!
Nepheles usually have green and brown forms. Some, especially comma often don't have the silver marking on the wing, or just a silver dot.
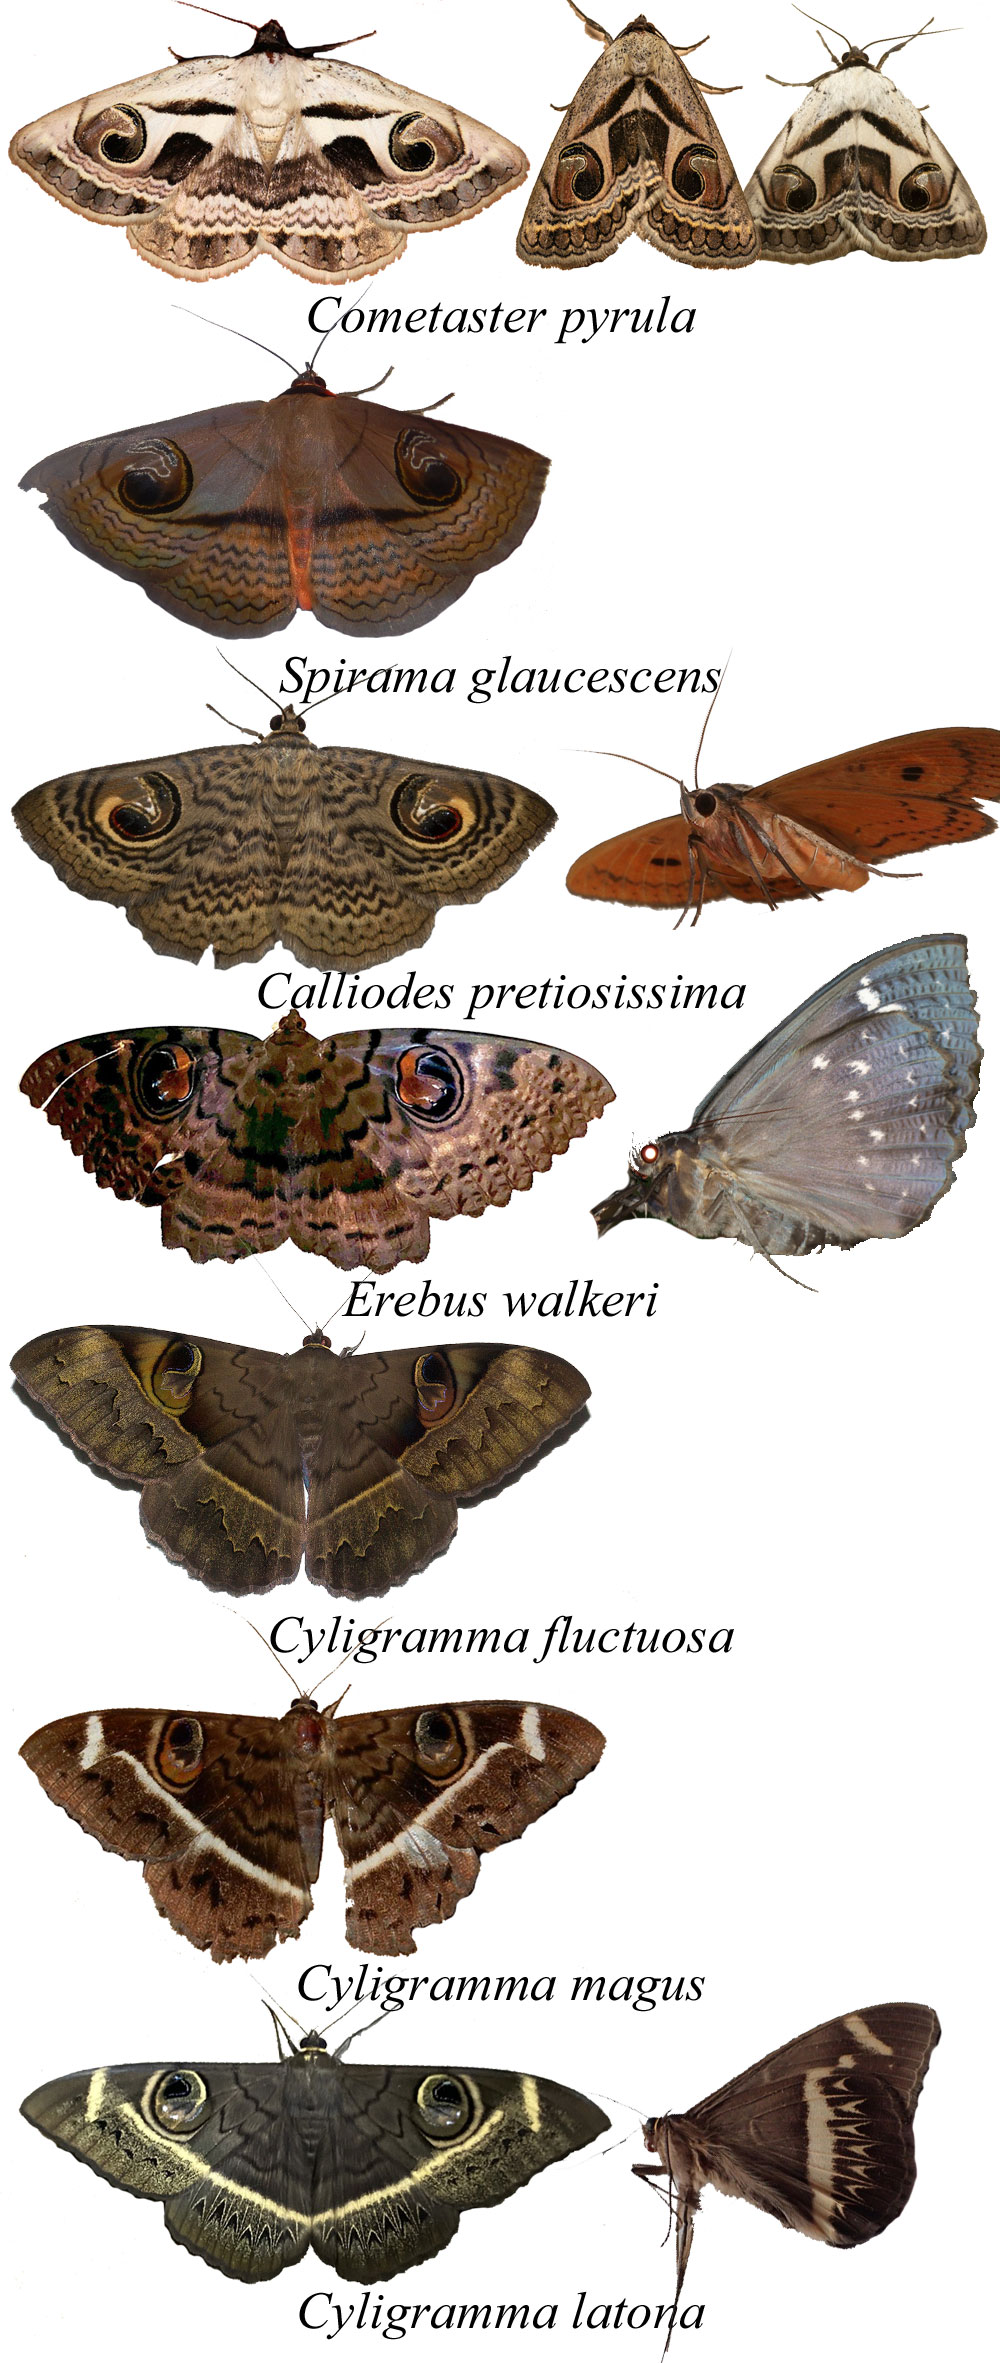
Apparently Cyligramma limacina does not occur in sA and obs on iNat are incorrectly ID'd and should be C. fluctuosa.
Cyligramma joa, a Madagascan species, may occur in sA. I have gone through all the Cyligramma obs on iNat and I don't see it there. C. joa on Afromoths - https://www.afromoths.net/species/43727
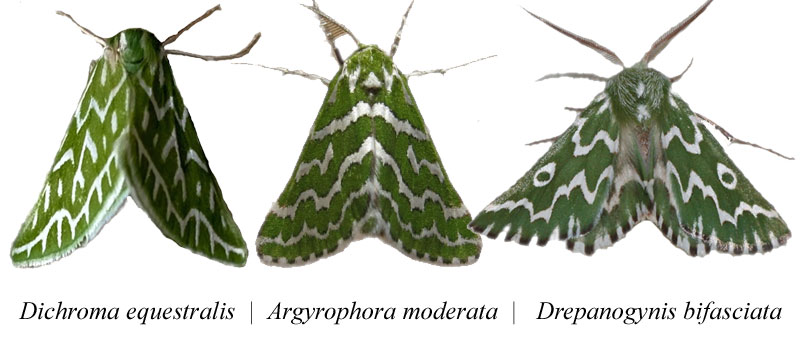
Most of these triangles are in the Erebidae except for the Pseudomaenas which are geometrids.
I have not been able to find any images of Fodina arctioides which has been described from KZN. When browsing the Fodina obs, it does seem to me that there are perhaps 2 species there, but I can't tell you if this is so, or which are which.
Fodina hypercompoides may also occur here, don't know what it looks like.
Parafodina ectrogia is listed as occuring in sA on Afromoths, but since the type and only other records are from West Africa, I doubt this.
Parachalciope euclidicola also occurs in sA, but I have no images of it (looks a bit like Chalciope delta according to Afromoths images).
Parachalciope benitensis may occur in sA - don't have any images.
Trigonodes exportata is the only Trig in sA. T. hypassia is from Burma. The most commonly incorrectly ID'd of these moths on iNat are Trigonodes and Parachalciope.
There are other Pseudomaenas species which superficially resemble Chalciope or Cuneisigna which I have not included because I personally don't get confused by them ;-)
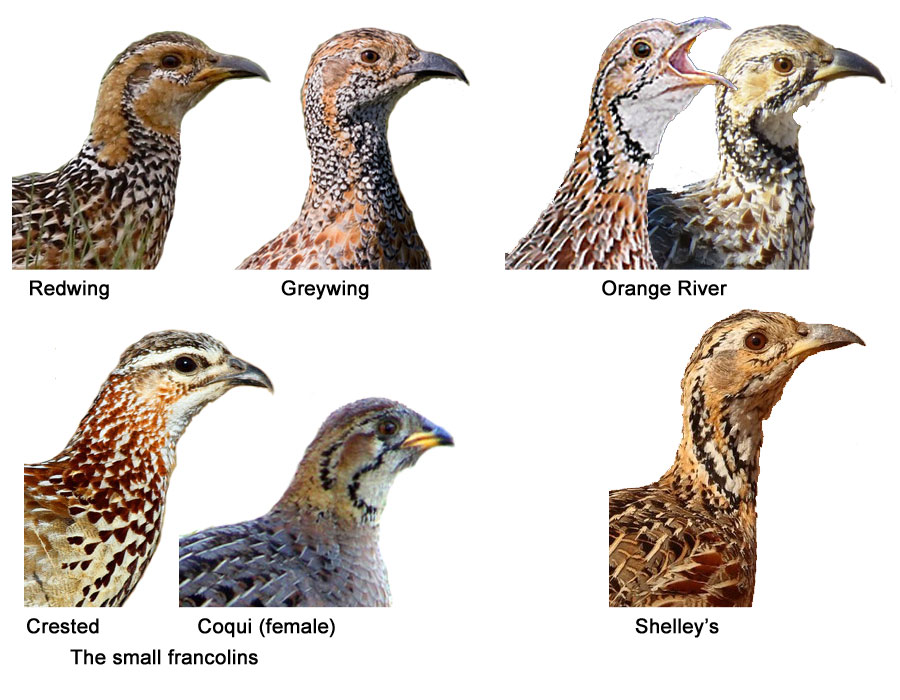
We have a lovely variety of francolins in southern Africa, and they can sometimes be tricky to ID.
The species are Greywing Francolin (Scleroptila afra), Redwing Francolin (S. levaillantii), Shelley's Francolin (S. shelleyi), Orange River Francolin (S. gutturalis), and to a lesser extent, Crested Francolin (Dendroperdix sephaena) and Coqui Francolin female (Peliperdix coqui).
I have tried to use neck patterns here because this is the bit that, fleetingly, sticks out from the grass as the little chaps hurry away out of sight.
1a. Neck pattern black speckles bordered by ochre on nape and throat...Redwing 1b. Neck pattern speckly rufous or chestnut with no black necklaces...Crested 1c. Neck pattern ochre, rufous or whitish bordered by black speckles or necklaces on both nape and throat...2
2a. Bill all black, neck pattern ochre or rufous bordered by black speckles on both sides...Greywing 2b. Bill yellow at base, necklaces more definite black...3
3a. Small bird with very short bill that is mostly yellow. Nape necklace does not extend to throat...Coqui female
3b. Medium sized birds with nape necklace extending to throat, bill large and hooked...4
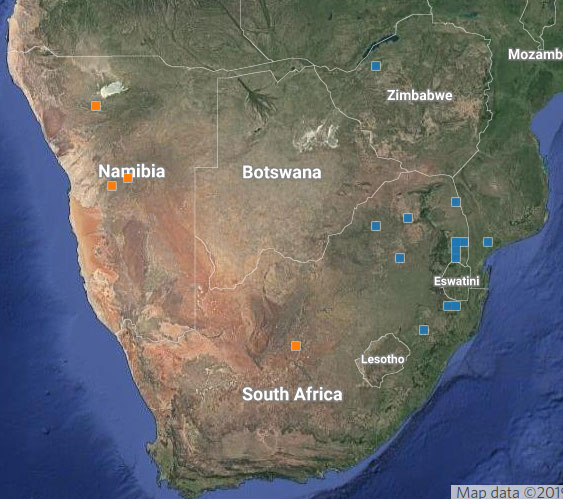
4a. Centre of belly barred black on white, distribution eastern...Shelley's 4b. Centre of belly faintly barred or spotted brownish on white, or flecked rufous on buff, never black barred, distribution western...Orange River
Current distribution records on iNat for Shelley's (blue) and Orange River (orange)
Hope this helps :-)
If you have any suggestions for improving this, please let me know!
Okay, so let's put some pics and sounds in your posts! The images and sound files have to be on the internet somewhere, they cannot be on your computer!!!
That's one image and it will be the width of the journal post box, like so:
STEP TWO - locating an image not on iNat To link to an image that's on the internet but not on iNat, you use the same method above. The image must be yours or you must have permission to use it and credit the photographer/illustrator (this is true for iNat pics as well, of course!!). The image has to be on the internet, not on your hard disk/computer!
STEP THREE - images in rows Now, if you want to add, say, 3 pics in a row, you need to add a bit of extra code to stipulate the width of each pic. We'll use percent rather than specific width so that it looks good on different screen sizes (hopefully). So, the extra code is style="width:33%" which will give you 3 pics in a row. If you want 2 pics then you'd use 50% etc.
STEP FOUR - adding spaces between pics in rows Now, the pics are all 'stuck together', which is not a bad thing, but you might want to have some 'breathing space' between them, so you need to add a bit of code to the style attribute - padding:10px; - so your code for each image now looks like this - <img src=""https://inaturalist-open-data.s3.amazonaws.com/photos/15496211/large.jpg" style="width:33%; padding:10px;"> and the pics look like this:
Argyrophora stramineata photo credit @karoopixie | Argyrophora arcualis photo credit @karoopixie | Argyrophora trofonia photo credit @karoopixie
You can change the width of the space between the pics as you choose. I have used 10 pixels here, but you can use less (~ 5px) or more (~ 20px). Play with it and see what works for you on the particular post you're creating.
Add captions and credits To get this to look awesome requires a lot of styling attributes, so I'm going to suggest a simple method only.
Beneath the photos type in the captions and credits (use @ mentions for images on iNat). Use a pipe (|) or other character between image credits. And I suggest you put a line beneath to separate it from the rest of the text. To add a horizontal line just type <hr>.
STEP FIVE - Advanced resizing (Only go here if you're feeling brave.)
In the above example the pics are all different sizes and you may want them the same height without squishing them widthways. For this you have to stipulate max-height and max-width. The max-width can remain a percentage, but the max-height has to be an actual pixel height which is where things can go a bit wobbly. So, to get the max-height you'll have to play around with pixel sizes until you get what you're looking for. Change the size and then check in PREVIEW how it's going to look. If it's not right, increase or decrease the number of pixels. For this example I have used 200px - style="max-width:33%; max-height:200px; padding:10px;" and it looks like this:
The original pics have to have a height of greater than your max-height to end up the same height on your post using this method. If the original pics are smaller, then you will end up with a row of pics of different heights anyway. This is very advanced stuff, so if you've got here, well done, and you can go and have a coffee now ;-)
You can add audio to posts too!
The basic code for adding iNat audio is:
<audio controls>

<source src="https://website.com/audio.mp3" type="audio/mpeg">

Your browser does not support the audio element.

<p>caption and credit</p>

</audio>
As with images, go to the observation that you want to embed, RIGHT-CLICK on the audio slider, LEFT-CLICK on copy audio address and PASTE it into your source code.
You can embed recordings from other sites too if they allow it. On Xeno-Canto you can click the "Embed" link and it will give you the code you need to add to your post. Just copy and paste, and it will look like so:
If you have any other suggestions, questions, improvements or amendments, just let me know :-)


